Friday, June 26, 2015

Gifts for an Angel Baby

A year after my angel baby, granddaughter, Ember Ruby, was born, we celebrated her birthday with a family gathering, over the Winter Solstice weekend.
My DIL's family rented a seaside cottage and we gathered there.
The  living area was decorated with hearts and beautiful balloons, made by POP Balloons.


On the second night the family made a bonfire on the beach and launched heart lanterns that soared out to sea.


 Later there were fireworks. 


It was a very special time that warmed our hearts and created precious memories to help carry us foward in a positive way.

My personal project for the occasion, has been to make some gifts for other angel babies.
 I know how much we were comforted by the beautiful items provided at the hospital. Some lovely things  to dress and cherish our angel, and more, to make a  Memory Box to treasure.
I was deeply touched by the kindness of the people who provide these items.
Now I want to pay it foward.

I am making two sets, one pink and one blue.
I've learnt that soft colours are best for items that will dress the babies.


My items are sized for a baby of 18-20 weeks gestation.
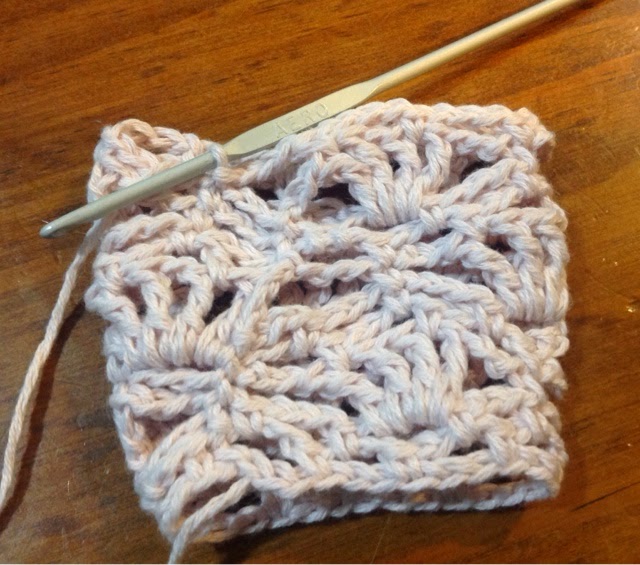
First I made cocoons - these are practical for wrapping and holding such a tiny baby. 
Basic pattern, by Myshelle Cole, is here  

I made my own variations for trims and hoods.  I made the closures adjustable for size
There are more details on my Ravelry project pages


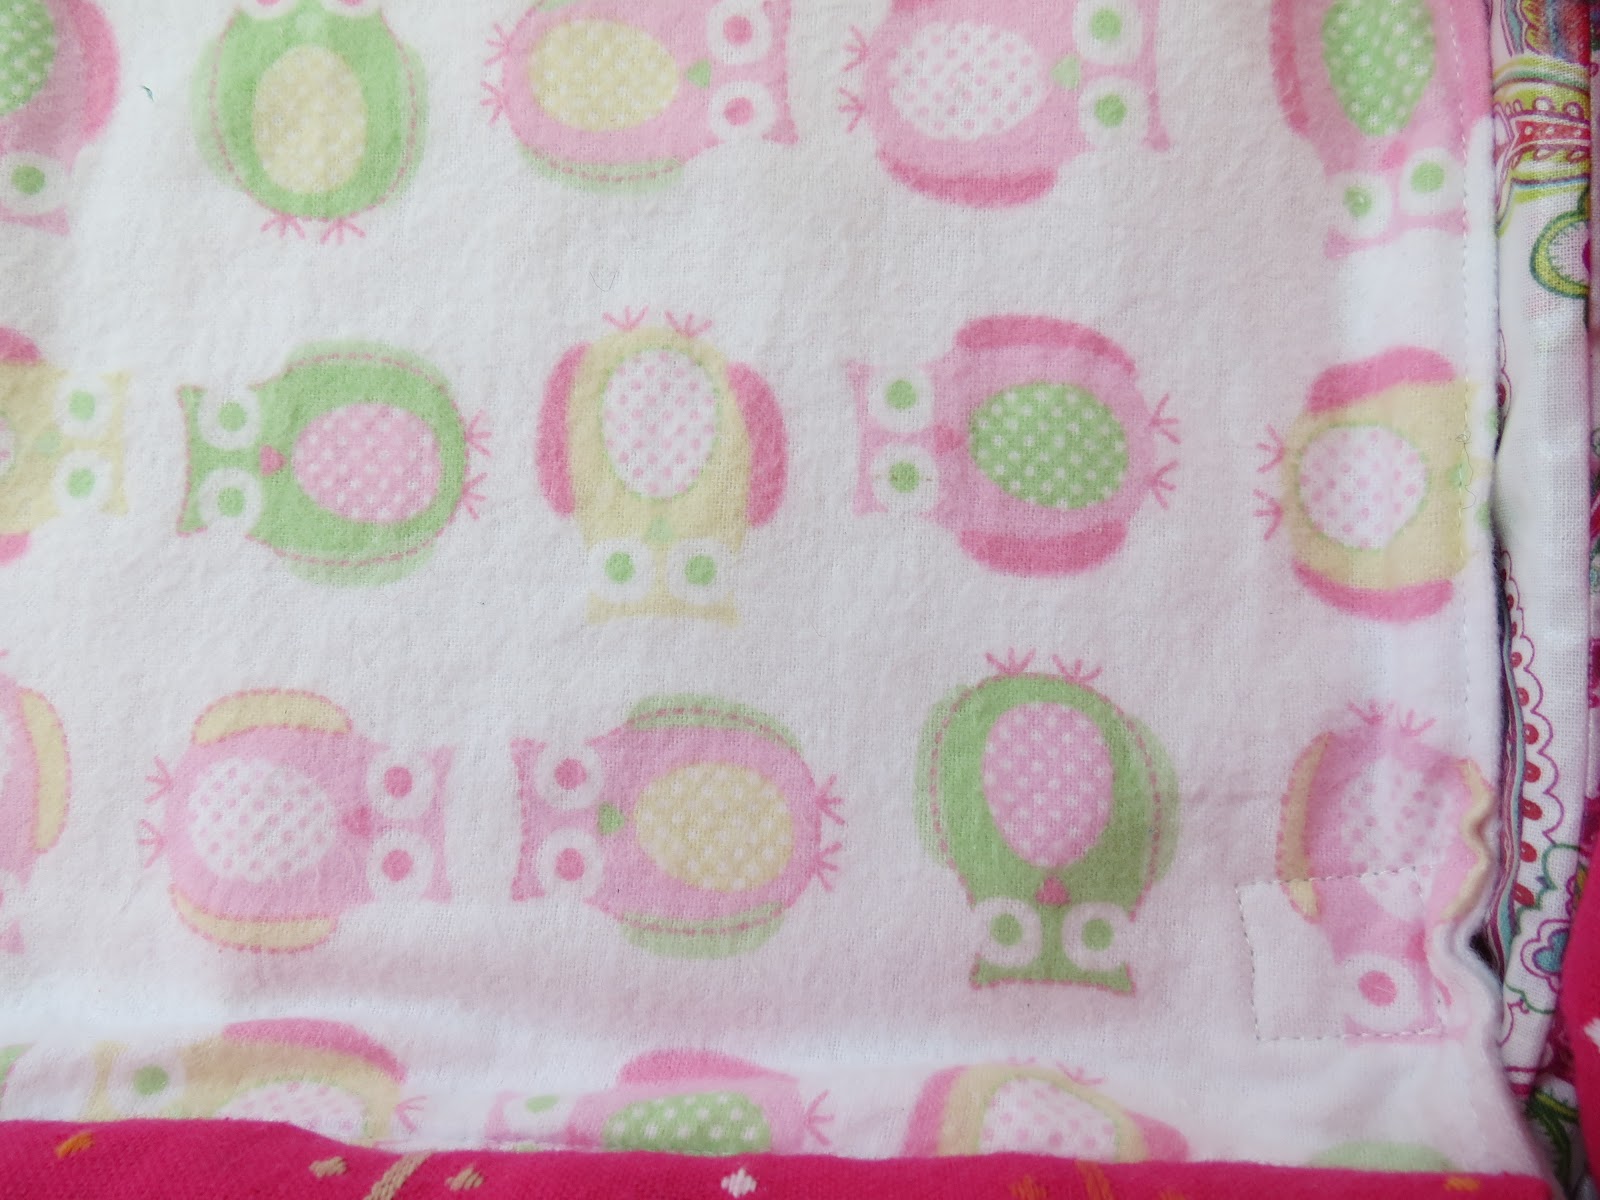
I made matching blankets for keepsakes.


Pattern by Maria Bittner, for the blue blanket, is here 

Each set will have two tiny teddies-one for the baby and one for a keepsake.


The Tiny Teddy pattern is by Lucy Ravenscar and can be found here

I hope my gifts bring comfort to a family with a new angel baby.


If you would like to make items for angel babies there are many organisations that will foward on your donations.
They are often local, so try an internet search for 'angel baby' to see what organisations there are in your country.

Photographs of balloons, lanterns, and fireworks by Hayley Munro Photography.

Saturday, June 13, 2015

Bonnet Measurements

I love bonnets for babies and little girls. I'm so pleased that they are making a comeback. I think that they are more feminine and practical than beanies. (They can't be pulled off quite as easily)
Bonnets have been the traditional hat for babies for many generations and in more than one culture. There are good reasons for that.

I collect old crochet patterns and made a traditional bonnet for my granddaughter when she was a tiny baby.


I made this Pixie Bonnet, too. Pattern by Crochetmylove Designs here:   Lace Pixie Bonnet


I  made a bonnet of my own design that looked very cute but didn't fit so well.


At the moment I'm making another bonnet as a gift for a friend's expected grandbaby. I'm modifying the pattern a bit, so I went in search of bonnet measurements on the net, to make sure that I get the fit right this time.
found a great chart at CharmedbyEwe,
 http://charmedbyewe.com/crochet-bonnet-size-chart/
but as is often the way with American instructions, there was no metric conversion. 

This is a bit of a gripe of mine because most of the world uses Metric measurements. America is one of only 3 countries that still use Imperial.
New Zealand changed to Metric measurements when I was a school girl. I had to learn how to use Metric measurement after having just mastered Imperial. 
The good thing about that was that I understand both, although my Imperial knowledge is rusty and I really only use it for the weight of newborn babies (which we all still seem to announce both ways) and sometimes if I'm too lazy to convert an American pattern to Metric.
 I own tape measures and scales with both types of measurement on them because that's how they were in the early years after conversion.
I notice that European books and websites often provide imperial conversions as a courtesy. I wish all American publications did the same.
End of grizzle. I've always thought that if somethhing bothers me enough I should stop complaining and do something about it.

I decided that it was very kind of Charmedbyewe to share her chart and if I wanted a conversion, I would do it myself. After all, not everyone learnt both systems and converting lots of measurements could be a daunting project if you aren't used to it, or don't have the time to spare.
Here is my chart. I hope that it is useful. 


Monday, November 24, 2014

The Ember Ruby Wine Glass Lanyard

             The Ember Ruby Wine Glass Lanyard


A friend shared a picture of a wine glass lanyard that she would like to have. I couldn't find a similar pattern so I made my own.


I've named my design 'The Ember Ruby Wine Glass Lanyard' in memory of my granddaughter, who was born prematurely at 20 weeks gestation, and lived for 3 hours.
Ember Ruby is a treasured member of our family.
Her mummy and daddy have been inspired by her short life. Their mission is to develop a design business, Ember Design, to carry on their daughter's name and to help others visualise their ideas.
They are taking part in a crowd funding project Spark My Potential
to raise the funds that they need.


I have written up the pattern for The Ember Ruby Wine Glass Lanyard .
There is no charge for this  pattern, but if you would like to pledge a few dollars to Ember Design's Project, that would be great.

Here are the instructions for

 'The Ember Ruby Wine Glass Lanyard'

Materials

3mm crochet hook
Cotton Yarn - I used Moda Vera Jalap-100% cotton-sport weight yarn

I have used American stitch names.
ch=chain
sl st =slip stitch
sc=single crochet
hdc=half double crochet
dc=double crochet
tr=treble


Instructions

Ch 28, join with a slip stitch in first ch, taking care not to twist the chain.

Working in rounds. Do not turn work.


Round 1
Ch 1, sc in next ch, 3 ch, miss 2 ch.
(sc, 3 ch, miss 2 ch) around.
Join with sl st in 1st sc.
You should have 9 loops/spaces.


Round 2
Ch 3. (1 sc in 3 ch space, ch 3) around. Sc in last 3 ch space. Join with sl st  in sl st of previous round.
You should have 9 loops/spaces.


Round 3
 *ch 3, miss next space, in following space work (1 tr, 1 ch) 3x, 1 tr, ch 3, miss next sc and  3 ch space, sc into next sc * around. Join with sl st, in sl st of previous round.
You should have 3 treble clusters.


Round 4
*3 ch, 1 sc between first and second tr. 4 ch, 1 sc between third and fourth tr, 3 ch, 1 sc in next sc* repeat around, but last time join with sl st in joining st from previous round, instead of last sc.
You should have 9 spaces.


Round 5
3 ch, 1 sc in first sc, 3 ch *1 sc in each space, 3 ch* around. Finish with sc in last sp, 3 ch, sl st to joining st from last round.


Round 6
4 ch. In first space work (1 tr, 1 ch) 3x. 
1 tr, 3 ch, miss next space.
*1 sc in next sc, ch 3, miss next 3 ch space, in following space work (1 tr, 1 ch) 3x, 1 tr, ch 3, miss next sc and space.* twice.
1 sc in next sc, 3 ch, join with sl st to top of 4 ch at beginning of round.
You should have 3 treble clusters in this round.


Round 7
Ch 3, sc  between first and second treble, ch 4, sc between third and fourth treble, Ch 3, skip space 1 sc in next sc * Ch 3, 1 sc between first and second treble, ch 4, 1 sc between third and fourth treble,  Ch 3, skip space, 1 sc in next sc* around. Ch 3, join with sl st to joining st from previous round.


Round 8
Ch 3, 1 sc in next space, ch 3. *1 sc in each space, 3ch* around. Sc in last sp, sl st to sl st from previous round.
9 spaces made.

Round 9
Ch 3, sc in first sc. Then repeat round 3. Last stitch is a sl st in joining sl st from previous round instead of  sc. 
You should have 3 clusters.


Round 10
Ch 3, sc in first sc. Repeat Round 4 to last sc between third and fourth treble, ch 3
Join in first sc.


Round 11 (Scalloped Edging)
Ch 1, *In each space, work (1 hdc, 1 dc, 1 hdc), sl st in sc,* around.
End with sl st in base of beginning ch 1.


Don't fasten off.
Strap
Make 150 ch. 


Join with sl st into opposite side of edging, between 5th and sixth scallop from start, working into stitch beneath sl st between scallops. 
(Take care not to twist the length of chain before you join it.)


Ch 1 and sl st into same st to the left of the first sl st.


Working on right side of stitches, sc into each chain until back to start.


Sl st in stitch below base of first ch. 


Fasten off.
Weave all ends in securely.

This design and pattern are my intellectual property, and as such are under copyright.
 Please do not sell or copy this pattern for commercial use.
You are welcome to sell items that you make from my pattern.
If you sell or blog about your projects online I would appreciate a link to this page.

If you find any errors, please let me know so that I can correct them.
Enjoy!

Friday, May 30, 2014

Petals for Blossom


My favourite crochet designer is Vita Apala. 
I just love her Mon Petit Violon Designs
They are so original and stylish.
She  has a great website with patterns, crochet articles and wonderful photos of her travels and life in Italy. Mon Petit Violon.com

When the  Petal Collar Cardigan pattern was released I knew that I would make it for Blossom.
You can buy the pattern here at Vita's Etsy Shop
or here in her Ravelry Shop
I find Vita's patterns  clearly written and fun to make.

This cardigan is for the competition that is currently on the Mon Petit Violon website.
I'm hoping that I will win 6 months of Vita's new patterns. I would love that.

I was  excited when I began making this cardigan.
The last time I made Blossom a jacket was when she was a newborn.
I got some lovely 100% wool yarn that I found in a thrift shop. It’ll be nice and warm for this winter. This is a vintage premium wool yarn, called 'Shepherd Taieri Plains'. A great find.

I had a few practice runs when I started the cardigan, to get the sizing and stitch count correct. I needed to check my yarn would work for size.
I worked from the 1-2 year size instructions.
I made one row less for the yoke, because it seemed big enough.
The grey wool yarn is very fuzzy so I used cream lambswool for the pattern details to get better stitch definition.
The cardigan is very warm and cosy.
I chose coconut shell buttons with a delicate floral pattern.

                                This cardigan looks gorgeous on. I’d definitely make it again. 
            I thought that it had a French flavour so I made Blossom a little beret in matching colours.
                                               She loves wearing her cardigan and beret.


                        Thanks to Hayley Munro Photography for my beautiful cover photo
                                                          of Blossom's  cardigan.
                                facebook.com/hayleymunrophotography

Saturday, April 13, 2013

Homemade Moisture Cream


I have been making my own moisture cream for more than 10 years. I like it so much that I prefer using it more than any moisturisers I could buy.
I love that I know exactly what is in it and that it is so safe that I could eat it.
I believe that if we put something on our skin it should be something that we would feel okay about eating.
The ingredients may seem a bit expensive but they make more than one batch of high quality product.

This moisture cream is based on a cold cream recipe.
Cold cream was invented thousands of years ago by the ancient Greeks so I guess you could say that it has withstood the test of time.
The recipe makes quite an oily cream but I find that it is very good for mature skin and as a hand and body cream.
I simply wipe my face with a cotton square  or a tissue after applying to remove any excess or shine.

  Here is the basic recipe:  
 You will need some clean pots for the finished product.
The recipe makes one average sized pot and one or two small ones that are a good travel or handbag size.
(The ingredients may seem a bit expensive but they make more than one batch of high quality product.
I consider them a good investment.)

20g Beeswax
80ml Almond Oil
40ml Macadamia or Avocado Oil (or a mixture)   
45ml Rosewater
1/2 teaspoon lecithin granules
4 drops lavender oil
4 drops rose oil
2 capsules Vit E oil (optional)


 Place Beeswax, Almond and Avocado oils in a double boiler and melt together.
 

Stir in lecithin.


Remove from the heat. Beat to help dissolve lecithin.

 Add Rosewater, essential oils and contents of Vit E capsules (prick them with a pin and squeeze) and beat until the mixture thickens.


Put cream into clean pots using a spatula.

Leave to cool. Wipe the pots with a paper towel and put the lids on.

You can vary the oils that you use to make this cream.
I have added small amounts of soya bean oil or wheatgerm oil at times.
Reduce the amount of the main oils so that the total amount remains the same as in the original recipe.
I mostly use  Macadamia oil as my main oil because I  like the resulting texture. It makes a relatively light cream that is easily absorbed.
Avocado oil makes a richer cream that has a pretty green tint.
The original cold cream recipe was made with olive oil. I tried this but found it to be a bit too greasy.

You can also adjust the amount  of rosewater to make a slightly lighter product.
Experiment and find out what you like.

I find that my cream is never quite the same each time but this is part of the fun of making my own.

The lavender oil helps to preserve the cream.
 It keeps very well and doesn't need refrigerating.
You could experiment with adding other essential oils, and vary the amounts to your preference.


Friday, October 5, 2012

'Lots of Love' Baby Changing Trolley


My number- two- son, daughter-in-law, Cee, and I made this changing trolly from an old oak teawagon, for the new baby in our family(Blossom). This is Cee and Number Two's present for their new niece.

I used this trolly for changing my sons' nappies, nearly 30 years ago.
It was languishing in  our garage in a sad state.
The top shelf was split, warped and broken away from the frame. Number Two replaced the shelf with an attractive piece of plywood and made the trolley stronger.
Then he and Cee sanded and revarnished it.
 Cee, Blossom's Mummy and I, went shopping for sumptuous fabrics. And then the creating began.
Cee and I made this fitted changing mat from wipeable coated paisley fabric. 

Next we padded the top of the trolley with soft cushions on the knobs and custom made bumpers for the surround. Cee spent ages stuffing the bumpers with recycled cushion stuffing pushed in with the handle of a wooden spoon.
 I made thick absorbant covers for the changing  mat from the pretty co-ordinating fabrics we had chosen. These attach to the mat with velcro.

I made a hanging organiser with pockets for the side of the trolley. This is to keep the most used items close to hand without cluttering the mat area.
I looked up how to make the elastic topped pockets on the internet, They are surprisingly easy.
I used this nappy bag tutorial http://www.craftster.org/forum/index.php?topic=38622.0
Each pocket is custom made to fit the items they hold. I shaped the pockets around the items before i sewed them. The wipes pocket is made large enough for the lid to be wide open when the wipes are being used.
The nappy cream pocket is backed with the wipeable fabric for practicality-no smears on the cotton fabric.
The other two pockets hold a nappy and the roll of liners.  The nappy pocket will hold a few disposables or one  cloth nappy with cover and inner assembled.
The bottom shelf of the trolley has plenty of room for more nappies, spare change mat covers, and clothing.
Eventually it will have more storage baskets to keep it tidy.
The trolley is a great sucess. It serves it's purpose really well.
I would like to hang a mobile above it to keep Blossom entertained while she is having a nappy change.

This is an original design by Cee and I and as such is our intellectual property.
You are welcome to use our ideas but please do not claim or sell it as your own design.